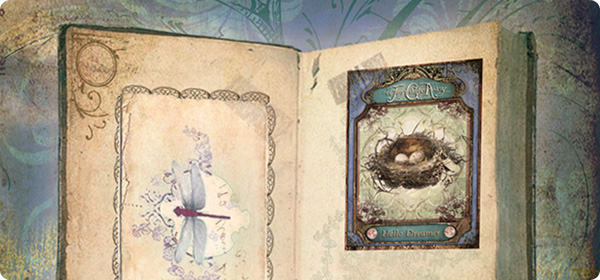
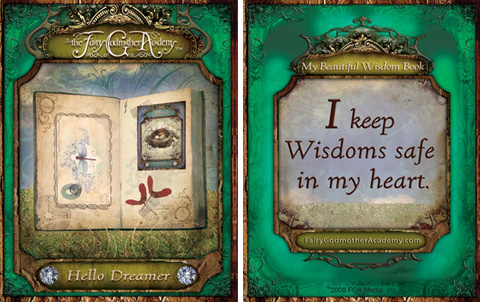
Collect your Wisdoms in your own one-of-a-kind Wisdom book!
Growing in Wisdom is the heart of being a fairy godmother in-the-making. Everything you do—both at the Fairy Godmother Academy and in your daily life—can bring you Wisdom if you’re really looking. As you find these treasures, honor them and keep them safe in your own beautiful handmade book. Here’s how:
Step 1. Choose a small blank book to decorate.
The perfect little book could be out there waiting for you—look around! 5 inches x 7 inches or smaller works well for Wisdoms. If you find a great book, skip down to Step 2.
Or…make your own book!
If you’d rather make your own Wisdom book, try this:
Materials:
- A stack of printer paper or sketchbook paper (try several colors!)
- 2 pieces of cardboard, mat board, foam core, paper bags or heavy art paper
- Optional: 2 large sheets of pretty art paper
- Scissors
- Pencil
- Ruler
- Glue stick
- Hole punch
- 3 lengths of yarn, twine, leather cord or ribbon
Make pages.
Find some pretty paper (bonus points for recycled paper!) and decide on a size. One easy way to make pages is to fold printer-size paper into quarters and then cut along the folds. Important: you’ll need an inch on the left side to bind your book. Remember that you won’t be able to write or draw in this space.
Fold and cut at least 5 pages and stack them all together. Try mixing different colors of paper, too!
20 pages makes a nice book
Mark 3 dots along one the left side of the top page:
¼ inch over and down from the top of the page
¼ inch in from the center (fold a test page in half to find the center)
¼ inch over and up from the bottom of the page
If your book is really small, it’s OK to just mark 2 holes.
Use a hole punch to make holes in the top page, and then use it as a guide for making holes in the rest of your pages.
mark and punch holes along the left side
Create a cover.
Paperback style: Use sturdy paper that’s still a little bendy. Try file folders, heavy watercolor paper or paper bags. Cut out 2 covers that are the same size as your inside pages.
cut and hole-punch 2 covers
Hardback style: This cover has a bend along the bound side that makes it easy to open your book flat. You can use heavier paper like cardboard, mat board or foam core board. Cut out 2 pieces the same size as your inside pages. Then cut a 1” strip lengthwise (vertically) from each cover. For each cover, glue the 2 pieces about ¼ inch apart onto a big piece of pretty paper or fabric that is 2 or 3 inches wider all around than the cover piece. Once the glue dries, wrap the covers with the paper/fabric just like you would wrap a present and glue it down. Then glue a different color page on the inside of each cover.
a hardback cover can bend to make it easier to write or draw.
paste in an endpage and punch holes to match the inside pages.
the finished covers
Bind your book.
Place the inside pages on the cover so it lines up the way you’d like. Use the inside pages as a guide to mark where the matching holes should be on each cover. Use a hole punch to cut out the cover holes on both covers. Put the covers on the outside of your pages, line everything up, and fasten with a binder clip. Tie your book together using yarn, twine, leather cord or fabric strips. Place a dot of glue on each knot to help it stay tied.
pull string or ribbon through each hole.
a finished book, ready to decorate.
Step 2. Design your cover
Draw, paint, or collage a beautiful cover. Don’t forget the back of the book and even the inside pages. Use these suggestions or find your own cool supplies.
- Photos
- Magazine pictures
- A special postcard
- Birdie or Kerka’s Wisdom Card
- Art paper, fabric or felt
- Leaves or flowers to trace
- Pens, pencils, paint or markers
- Glitter, stickers or stamps
- Glue (a glue stick works well)
Step 3. Add your first Wisdom!
Wisdoms guide our hearts and blossom as we grow.
You could write this Wisdom on your first page, or come up with your own – maybe it’s from a Wisdom card you like, or something meaningful you’ve learned from a friend or family member. Best of all, maybe this is the place where you start finding your own internal Wisdom—whether it comes to you as words, drawings, or even music.
Once you’re book is finished, tell Birdie about it and send her a picture!
send Birdie a message | learn more about Wisdom | see more Wisdom Cards


This is a great idea!
soooo cool
I love this! I want to make one!
I hope you all made Wisdom Books! Write again to share what you wrote inside 🙂
Yeah it is really cool
This looks cool I want to make it!
Heyy This is coool!!!!!!! 😛 let me make one duhhh. 🙂 Byeee.
i am starting to make a wisdom book .
WOW!!! IM SO DOING THIS!!
cooooool this my 1st day here
hi guess what alisha?!?!?!? this is my first day here too!!!! exept you joined the day my cousin graduated (yesterday) so i couldn’t join sooner 🙁 ohwell =’)
omg that looks so awsome i totally want to make 1
this is SO cool! i made a dream journal, but i think i will make one of these 2!!!!!!!:)
I wanna make one!
I made one and its so cool. There just perfect.
so awesome! wanna make one! it’s just so beautiful!
theyre really pretty i wanna make one but it probably wont turn out as good as those
This is too awesome!!! 😀 😀 😀
I will make one right away! 🙂
I will make one or more wisdom books this christmas
i made a wisdom book…..and i want to say that i love this activity! it really gave me a chance to be inspired and show my true self! i actually made one for my friend too and she loved it! bye peeps! 😉 8)
so awesome
actually when i made one my aunt helped me with the designing cuz like kerka..my mom is dead 🙁 🙁
i think this book is really cute. u all right jamie?
im gonna start a dream journal soon.
I want to make a dream book !!!!!!!!!!!!
me too
i now you u probly wont believe me but iv really been to adventurine. it was gourguess. animals were every were. there hasnt been a book with Quenn Anita. its the animaletins leniege
bye peeps!!
I loooooooovvvvvvvvvvvvvvvvveeeeeeeeee this idea!!!!!!!!!!!!!!!!!!!!!!!!!
pretty but i dont have the materials 🙁 liana_evana want 2 be friends?
does anyone want to be my friend?
Totally:]
i am so totally go ING 2 do this cant wait!!!!!!!!!!!!!!!!!!!!!!!!
I want to be the best fairy god mother full of wisdom so please add me or comment. (Write the comment with your wisdom) Please say my name because the computer might lose this comment and i will know you have commented to me. Thank you. So i’ll walk on you in my footsteps hope to see you soon!,.,.,.,.,.,.,
This is great! I’m surprised you can have a wisdom book. I never thought of it! Well, Birdie can’t… well…
I totally love it!!!!!!!!!!!!!!!!!!!!!!!!!!!!!!!!!!!!!!!!!!!!!!!!!!!!!!!!!!!!!!!!!!!!!!!!!!!!!!!!!!!!!!!!!!!!!!!!!!!!!!!!!!!!!!!!!!!!!!!!!!!!!!!!!!!!!!!!!!!!!!!!!!!
o my gosh this is so cute i love birds nests
srry wrong idea but this is so cute too looovvee iiittt!!!!!!!!!!!!!!!!!!!!!
Dit is een groot vak! Ik had een leuke tijd te maken this.If u een vertaling nodig is dit dutch.once weer …. dit is een geweldige ambacht!
whoops rouwig om het gedeelte dat zegt Nederlandse im gebruikt om elk één begrip mijn taal
I’ve already made one, but I want to make another, more official one. I find some of the best things at my local craft store, so anybody making a book should really check craft stores out. I even used to have a pet daisy, Mel. After a while she died, because, obviously, plants die. But she was a white gerber daisy and a joy to have on the front porch.
hi it is my 1st day hear!!!
i am so doing this
so fun!!!
can we print wisdom cards?
i am making my Wisdom Book right now!
I made one its green with butterflies sketches
this is soo super cool! I L-O-V-E this idea and every other one!
this is the best idea and I love every book!
love it!
awesome
great idea!
Yessss! Love making Books!